A Flash resource for Python

As I introduce Key Stage 3 groups to Python, I’m finding that some of them really “get it” and have started trying to develop and experiment with code, while others really struggle to make any sense of it at all.

In order to help them work more independently at all levels, to free me up to give more targeted help where needed, I wanted a resource I could use that would offer support at all levels.

I had an idea for an interactive Flash resource, to offer different levels of challenge, with support available if needed. I keep looking at Flash, telling myself that it’s not worth going into, and then reconsidering, so it was an ideal opportunity to see if I could make good use of it after all.

developing a resource in flash

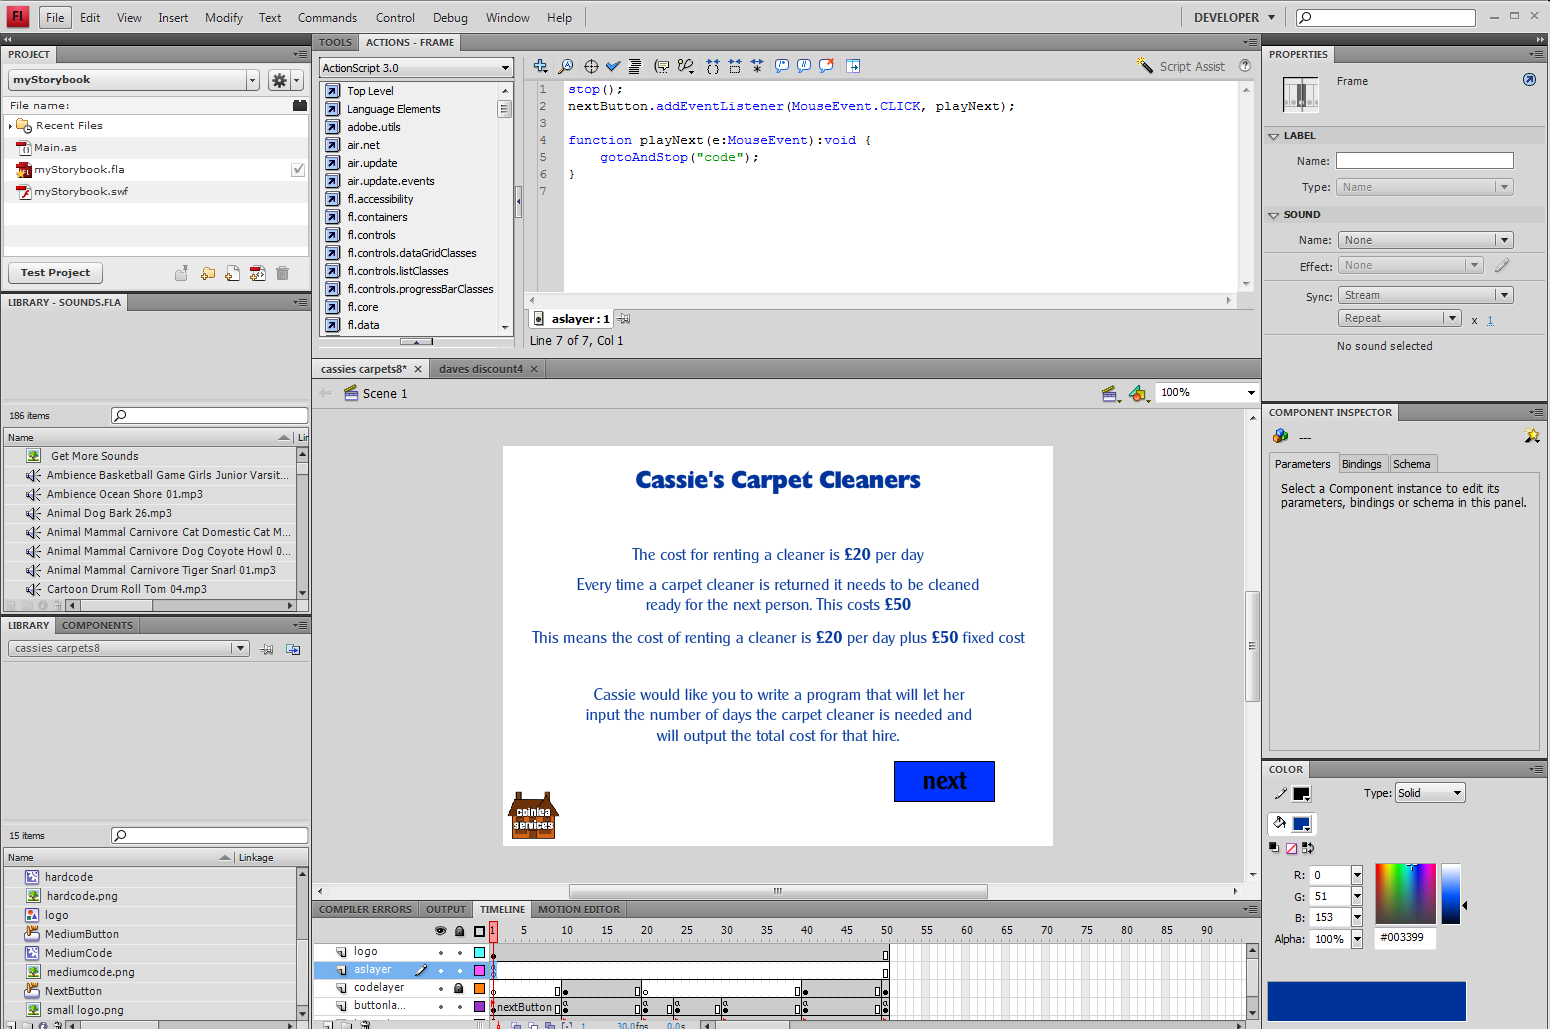
Developing a resource in Flash

I came up with a simple idea for a coding project – working out the costs of something with a fixed element and a sliding element – that was within their mathematical understanding as well as programming experience but complex enough to require some thinking. Once the basic idea was there, I found ways to develop it, from a simple changing of the fixed and sliding costs to adding a discount which would require an if statement, and started to build my resource.

This was my first time creating an interactive flash resource for a specific purpose, but having tried out various tutorials I had at least a vague idea of how it worked, and as I progressed I found that all that theory started to make sense and I got a much clearer idea of how to proceed.

The end result was a resource that posed a problem, provided listings for students to copy if they needed, and then provided three levels of challenge, each of which could be tackled independently, again with code to copy if needed.

I tried it out with students of various abilities, all of whom are very new to Python, and all completed the basic program, the majority tried at least one challenge and the bravest went straight to the highest level of challenge.
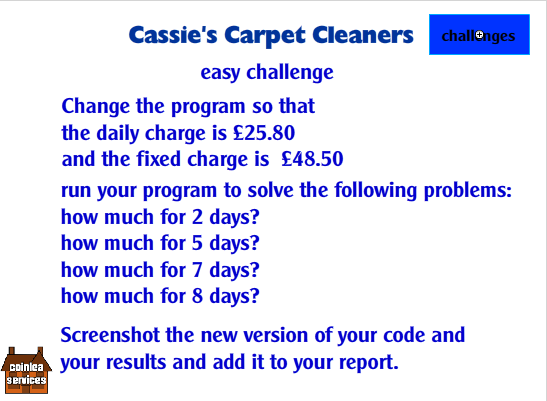
Easy challenge

Easy challenge

While I wouldn’t recommend copying code indefinitely, students at the early end of learning to program definitely benefit from having something to work from, as checking capitals and spelling can be enough of a challenge to start with! They are starting to look more carefully at what they do, and to see how to adapt their code, and some are starting to show the buzz of excitement at getting a program running that shows they are getting a real sense of achievement at coding rather than just being an end user of software.

I’ve since adapted my resource to a second project, and while the first took a couple of evenings to complete the second one took only a couple of hours, and felt much easier to do, proving that Flash is a viable tool for creating interactive resources.

Both resources are available on my website.


Resources in a flash!

I’ve been busy over the past few days getting ready for the start of the new term in a more practical, immediate way, but today I’ve decided it’s time for another play.  I’m ambivalent about using Flash: it’s brilliant fun, and produces some good products, but it’s fiddly with little help for debugging, it feels like a dead end, and with no support for iOS, Android withdrawing support and with HTML 5 coming up, I’m not sure it will be around for much longer.

However, I have dabbled in it, both animating and coding, and it seemed an ideal way to combine the work I’ve been doing in a useful way.

I’ve been using Cam Studio, Audacity and MoviePlus to make screen capture videos with narration, to help my students use Serif MoviePlus, and the result is a collection of nine videos, the shortest 40 seconds (trimming and splitting) and the longest 4:30 (transform effects).  I wanted a way to tie all the videos together for ease of selection.

I could use powerpoint of course; in fact I already have a hyperlinked powerpoint on MoviePlus which I’ll probably add the videos to at some stage, but I wanted to try building a flash project to house the videos.  It’s based on chapter 7 of Adobe Flash CS4 Professional Classroom in a Book, which has a project showing how to link videos together.

I used the adobe encoder to encode the videos into Flash format, then examined the finished project from chapter 7, which I worked through a few months ago.  The code for the buttons was very straightforward, so I created a graphic for a button and put together a version just to check out that it would work.

first try at flash embedded movie

first version of flash resource to play tutorial vids

I was pleased with the result: I have a screen with a button on it.  The button is animated for mouseover and mousedown, and when pressed it activates the appropriate video, complete with playback skin containing video and volume controls.  The button is too large, and the project itself probably too small to contain all buttons plus the video playback, but the principle has been well and truly proven.

Time to create all the button graphics then!

I used Drawplus to create the original buttons, then adjusted size and position for the different button states in Flash, but I wasn’t happy with the results – the text on the buttons looks rather blurry, and I think next time I’ll try creating them directly in Flash, or have a closer look at the export settings.  I had a reminder of some of the problems I’ve found with Flash: it can be rather fiddly at times, and really doesn’t like being messed with – I’ve found it’s far easier to spend a few minutes planning and do exactly what I want from the beginning, rather than to rush in and try to fix things on the fly.  I also remembered eventually that it’s far easier to use layers to separate elements on the page.  I did use a little maths to get the elements to line up properly and adjust the size of the finished project to accommodate all the elements.

completed design - nearly working, just one problem

finished product (looks good, not quite working yet)

This is the finished project: I have 9 buttons plus a video window, and clicking on any of the buttons brings up the associated video.  The only problem for a while (and it was a fairly major one, to be honest!) was that as I switched from one video to the next the sound from the previous one would keep playing.

Still, the code itself was remarkably simple:

startButton1.addEventListener(MouseEvent.CLICK,clickListener1);
function clickListener1(event:MouseEvent):void {
     gotoAndStop("startvid");
}

This is placed on the actions layer, in the first frame of the timeline, and repeated for each button, changing the name of the button, the number of the clickListener and the name of the frame to move to.    The action in frame 40 is just stop(); – there’s no actual animation in the project between frame 1 and frame 40, but I left the space there just in case I decide to include any.

partial timeline showing named frames

part of the timeline, showing named frames

This is my timeline, showing that I’ve named frames for each video.  Each button listener function sends the playhead to the appropriate frame, and the video inside its control starts playing automatically.  The timeline stops on the first frame of the section, but the rest are there as padding so I can see the name of the frame.

So I’ve learned a lot on this project so far, and while it’s been time consuming the learning has been worth the time spent and next time round I’ll be more confident in what I’m doing and so will work faster.

A little playing around to tidy up the project miraculously seemed to fix the sound problem, so I now have a finished resource (or set of resources) ready for use, plus the confidence that comes from tackling a project and making it all work, plus a template that I can use again and again to link videos together (I’ve had students say: “Your video was useful, Miss, but I did have to play it over and over and keep stopping it!”).

In the meantime, I’ll also dig out my hyperlinked powerpoint and try not to fall asleep adding the videos to it!